
Writing a plan takes two clicks. In the weekly view, find the box for the day and period you want, then click Edit.
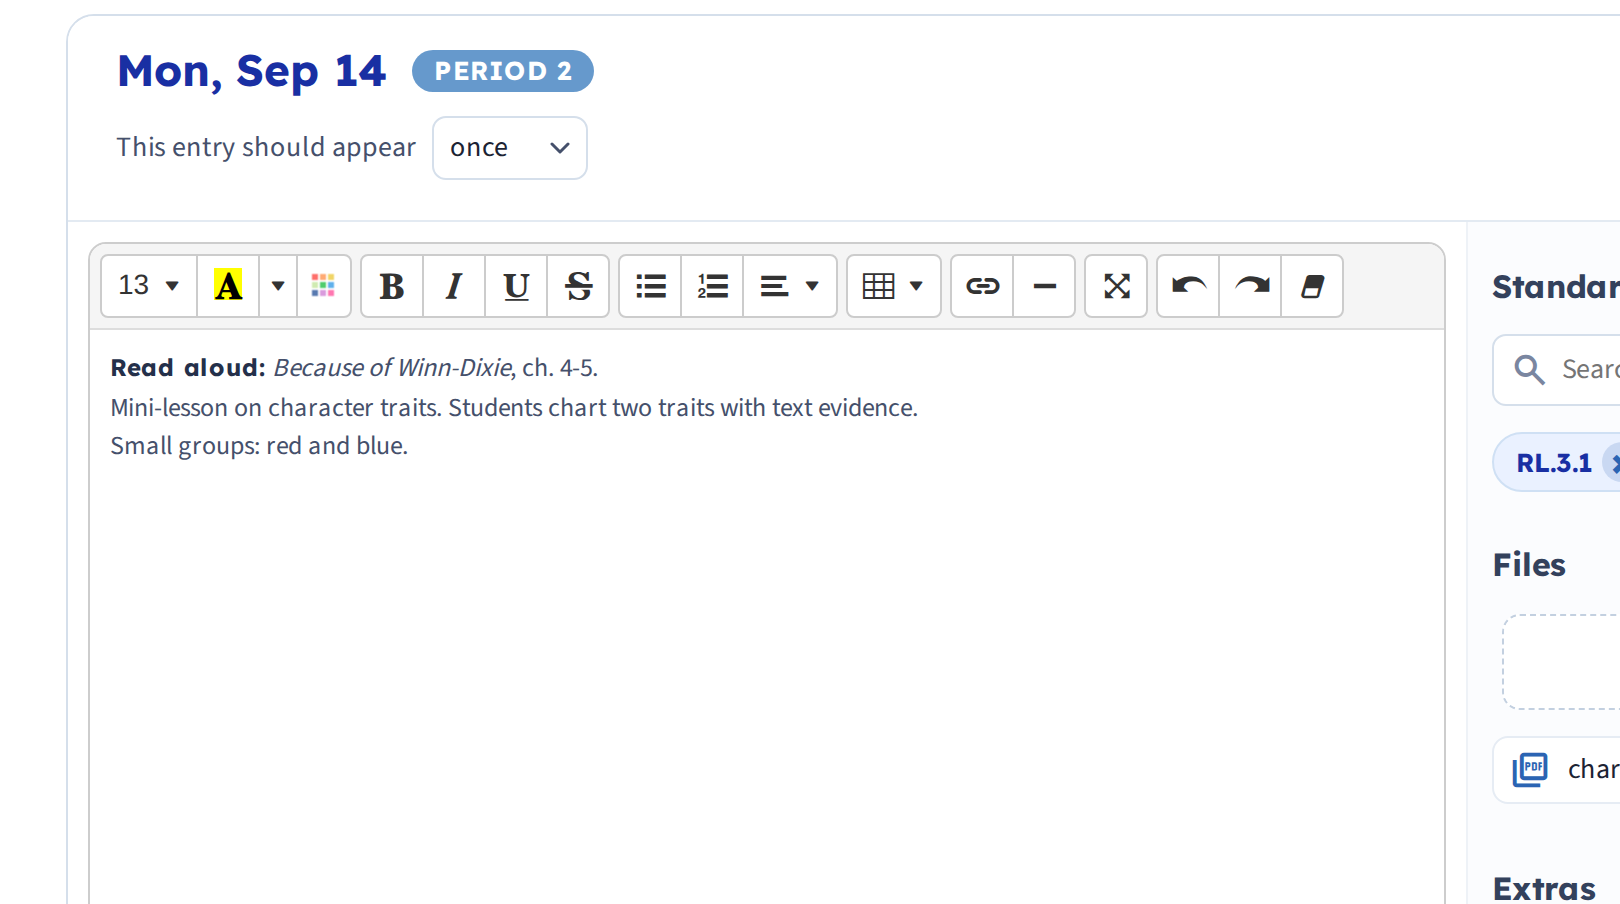
The editor
Type your plan in the main box. The toolbar gives you the usual formatting — bold, italic, lists, links, colour and highlighting — so you can lay a plan out the way you would on paper.
Click Save when you are done. Your plan appears in the grid immediately.
Make an entry repeat
The This entry should appear dropdown at the top is the setting most worth learning early. Leave it on once for a one-off lesson, or change it to have the same entry appear every day, every week, or on the same day all year.
That one setting is how teachers avoid retyping duty schedules, specials and weekly routines. Set it once in August and it fills the year.
- Click Edit on the box you want.
- Choose how often the entry should appear.
- Type your plan.
- Click Save.
Attach files and extras
On the right of the editor:
- Upload a file — attach a worksheet, slide deck or PDF to this lesson.
- Hide from shared plans — keep this entry private when you share the week with a substitute or administrator.
- Lock this entry to this day — stop it from moving when you bump plans forward.
There is a faster way to make small changes: double-click any box in the weekly view to type straight into the grid. It skips the repeat setting, standards and attachments, so use Edit when you need those.
Next: Free vs. Premium.