
Under the basic settings on the planbook edit screen there's a Show Advanced Options button. Everything below controls how the grid is labeled and laid out, rather than what's in it.
Click Planbooks, then Edit next to your planbook, then Show Advanced Options.
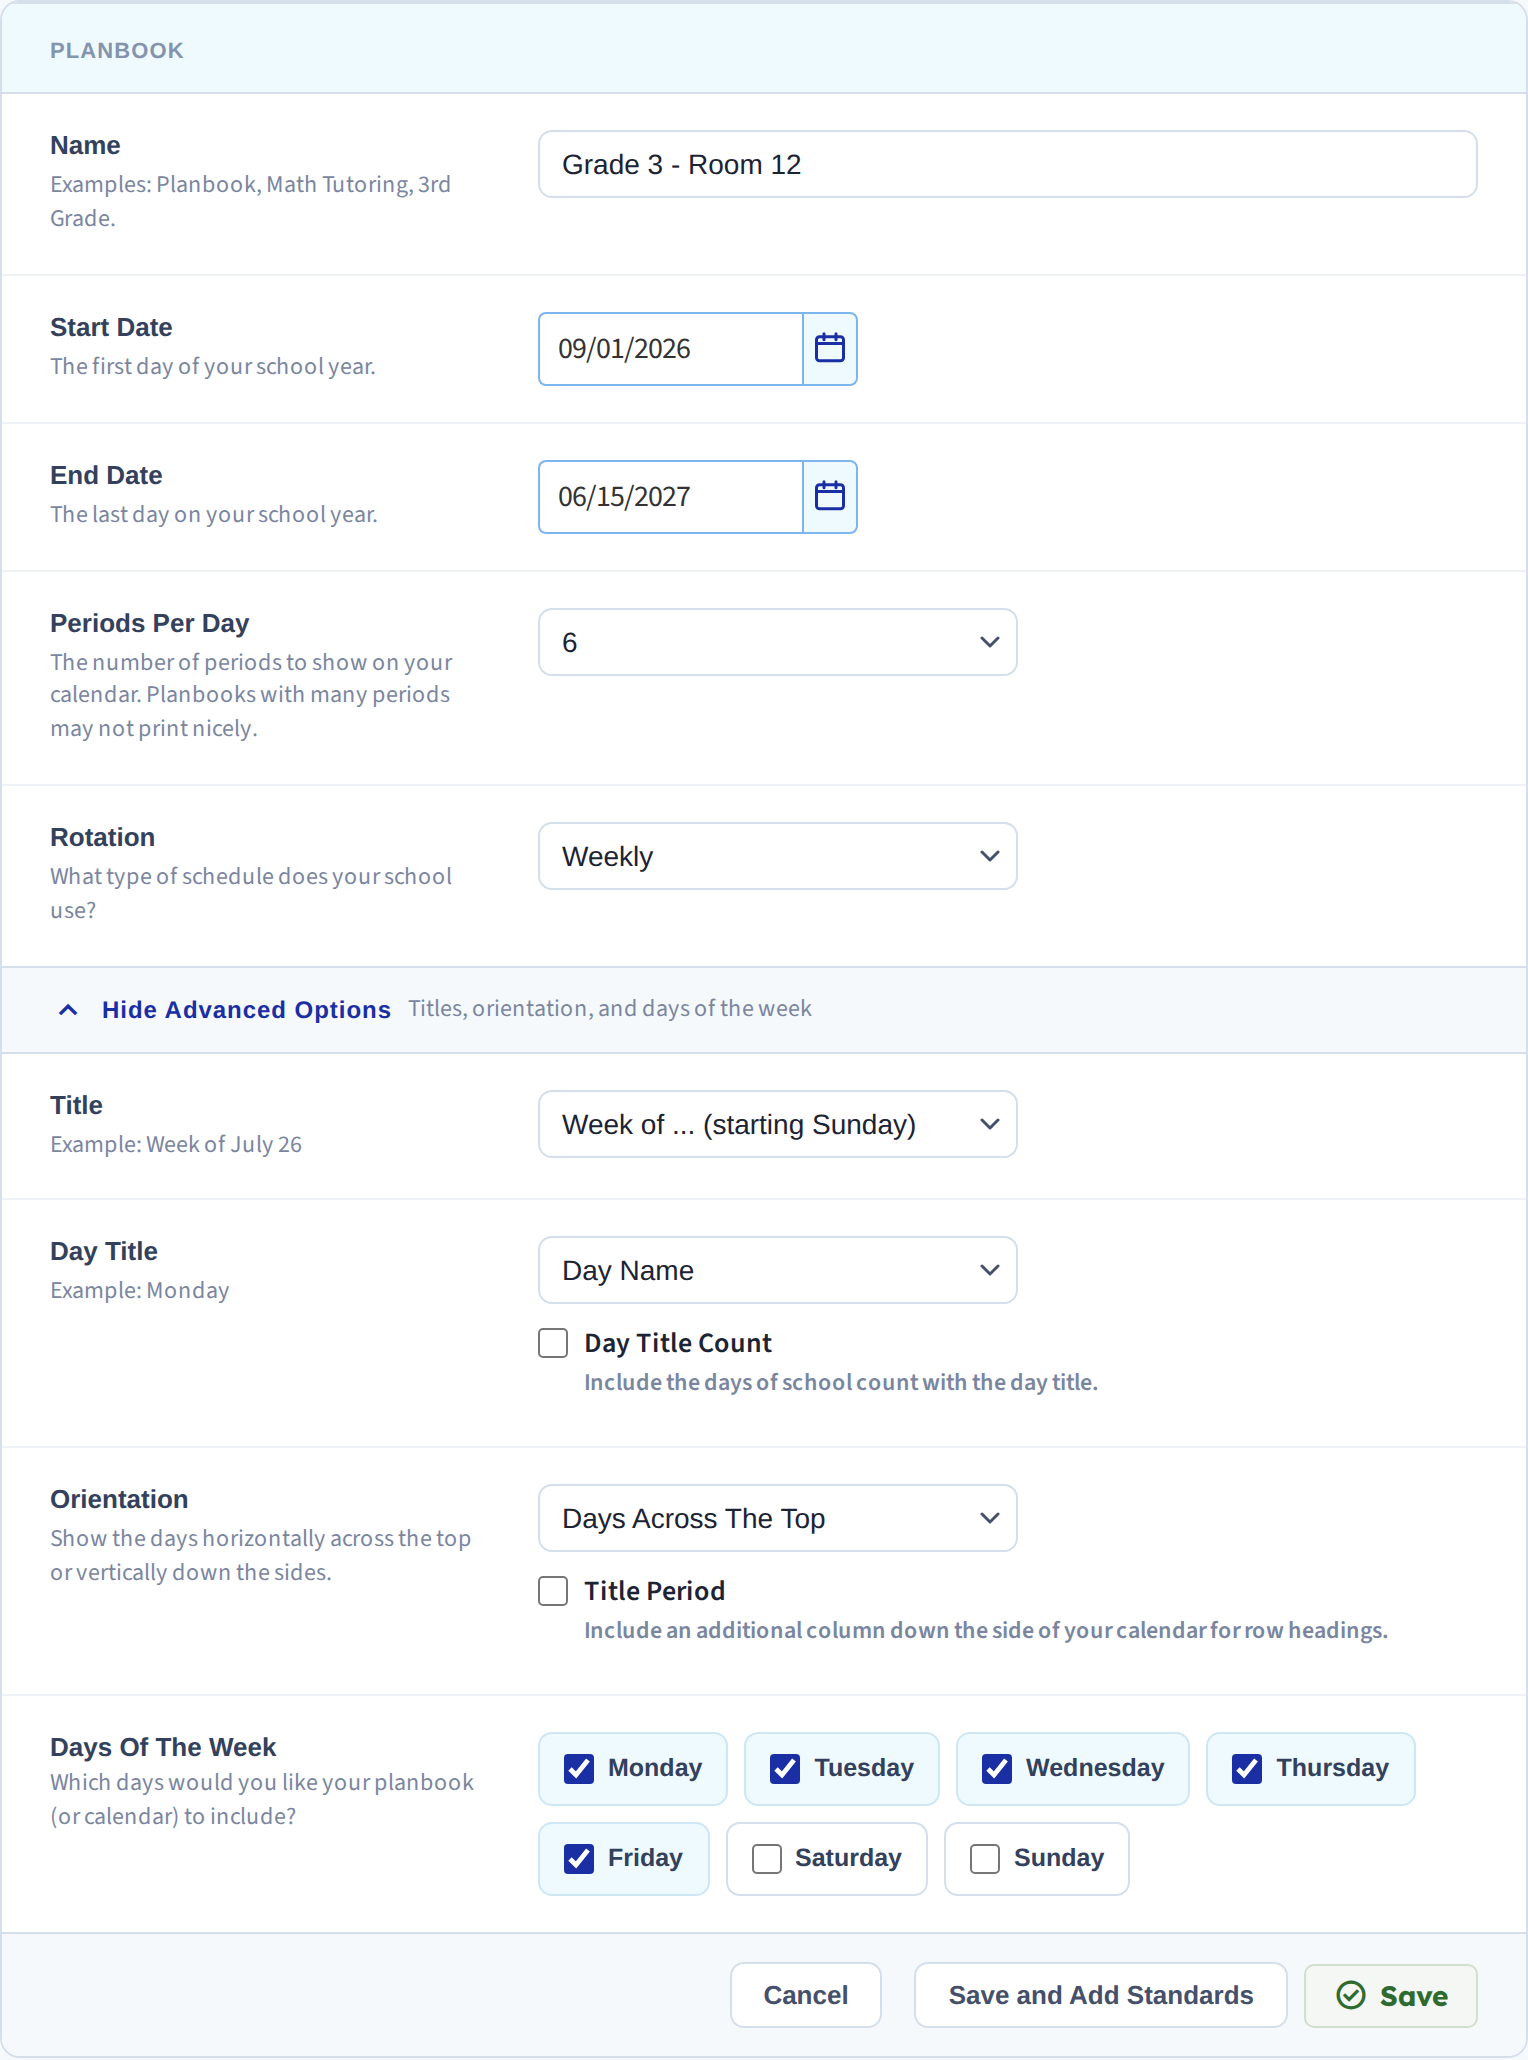
Title
What appears as the heading above your week:
- Week of … (starting Sunday) — "Week of August 02"
- Week of … (starting Monday) — the same, counted from Monday
- Name Only — your planbook's name instead of a date
Choose Name Only if you'd rather see "Grade 3 — Room 12" at the top than the date, which the calendar already tells you.
Day Title
How each day column is labeled. Six choices, from shortest to longest:
- Day Name — Monday
- Month and Day — August 3
- Day Name and Day — Monday 3
- Day Name, Month, and Day — Monday, August 3
- Month, Day, and Year — August 3, 2026
- Day Name, Month, Day, and Year — Monday, August 3, 2026
Shorter labels leave more room for plans, which matters most when you print.
Day Title Count is a checkbox next to it. Tick it to include the day-of-school count in the label, so you get "Monday (Day 42)". Useful if your district tracks instructional days.
Orientation
Two options: Days Across The Top (days are columns, periods are rows) or days listed down the side. This is the single biggest change to how the grid looks — see Change your planbook's orientation.
Title Period
A checkbox that adds one extra row or column for headings. With days across the top it gives you a column down the side to name each period; with days down the side it gives you a row across the top. See Rename a period or the title row.
Days Of The Week
Which days your planbook includes. Most teachers leave this at Monday–Friday, but you can add or remove any day — useful if you teach Saturday sessions, or if you want a four-day week without a permanently empty Friday column.
Removing a day hides its column. It does not delete plans you already wrote there; add the day back and they reappear.
Click Save when you're finished.