
Orientation decides which way your grid runs. It's the setting with the biggest visual effect, and it's a single dropdown.
- Click Planbooks, then Edit next to your planbook.
- Click Show Advanced Options.
- Set Orientation.
- Click Save.
The two choices
Days Across The Top — days are columns, periods are rows. This is the default and it's the classic paper planbook layout. It suits teachers with several periods a day, because each period gets its own row across the week.
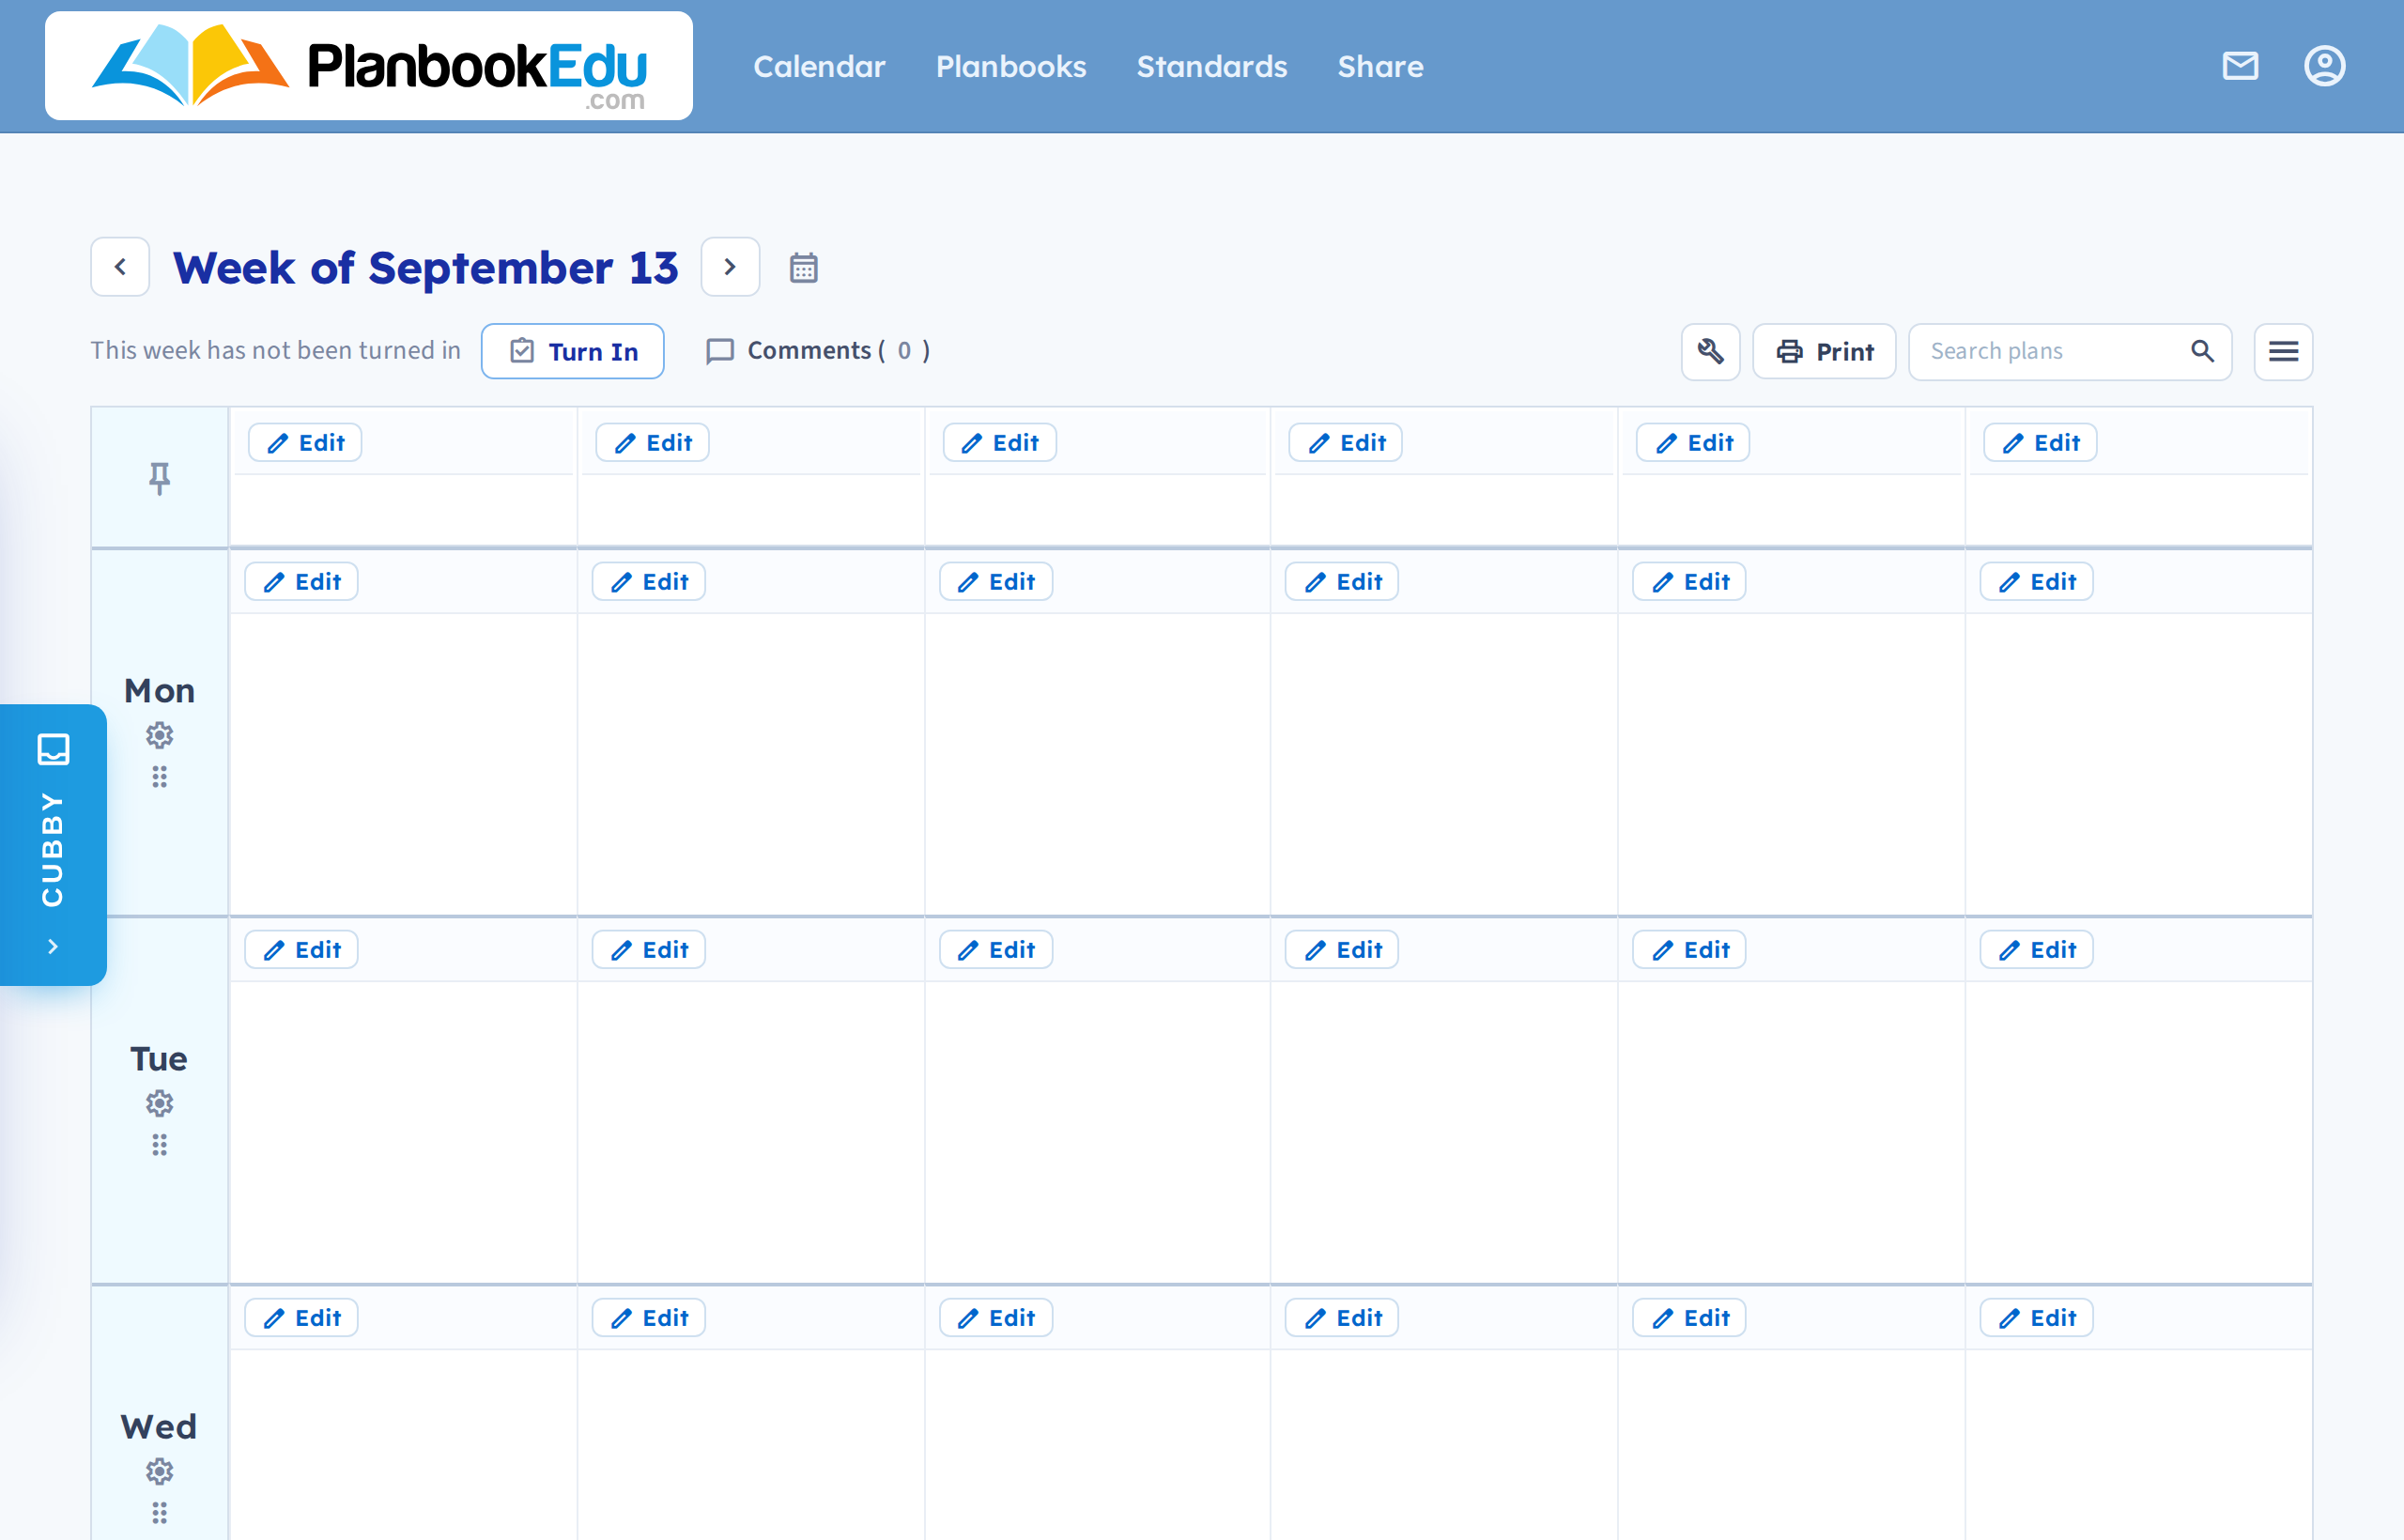
Days Down The Side — days are rows, periods are columns. This gives each day more vertical room, which suits elementary teachers who write longer plans for fewer blocks.
What changes when you switch
Nothing is lost. The same plans are drawn the other way round.
The one setting that follows orientation is the title period. With days across the top it's the column down the side; with days down the side it's the row across the top. Either way it holds your period names — see Rename a period or the title row.
Printing changes too. Days-across-the-top generally prints a week to a landscape page more comfortably; days-down-the-side often reads better in portrait. It's worth a test print either way — see Print your plans.
Try it and switch back if you don't like it. Orientation is only a display setting, so flipping it repeatedly does no harm to your plans.