
Every planbook has four basic settings. They're the ones you chose when you created it, and you can change any of them later.
To reach them, click Planbooks in the navigation bar, then Edit next to the planbook you want to change.
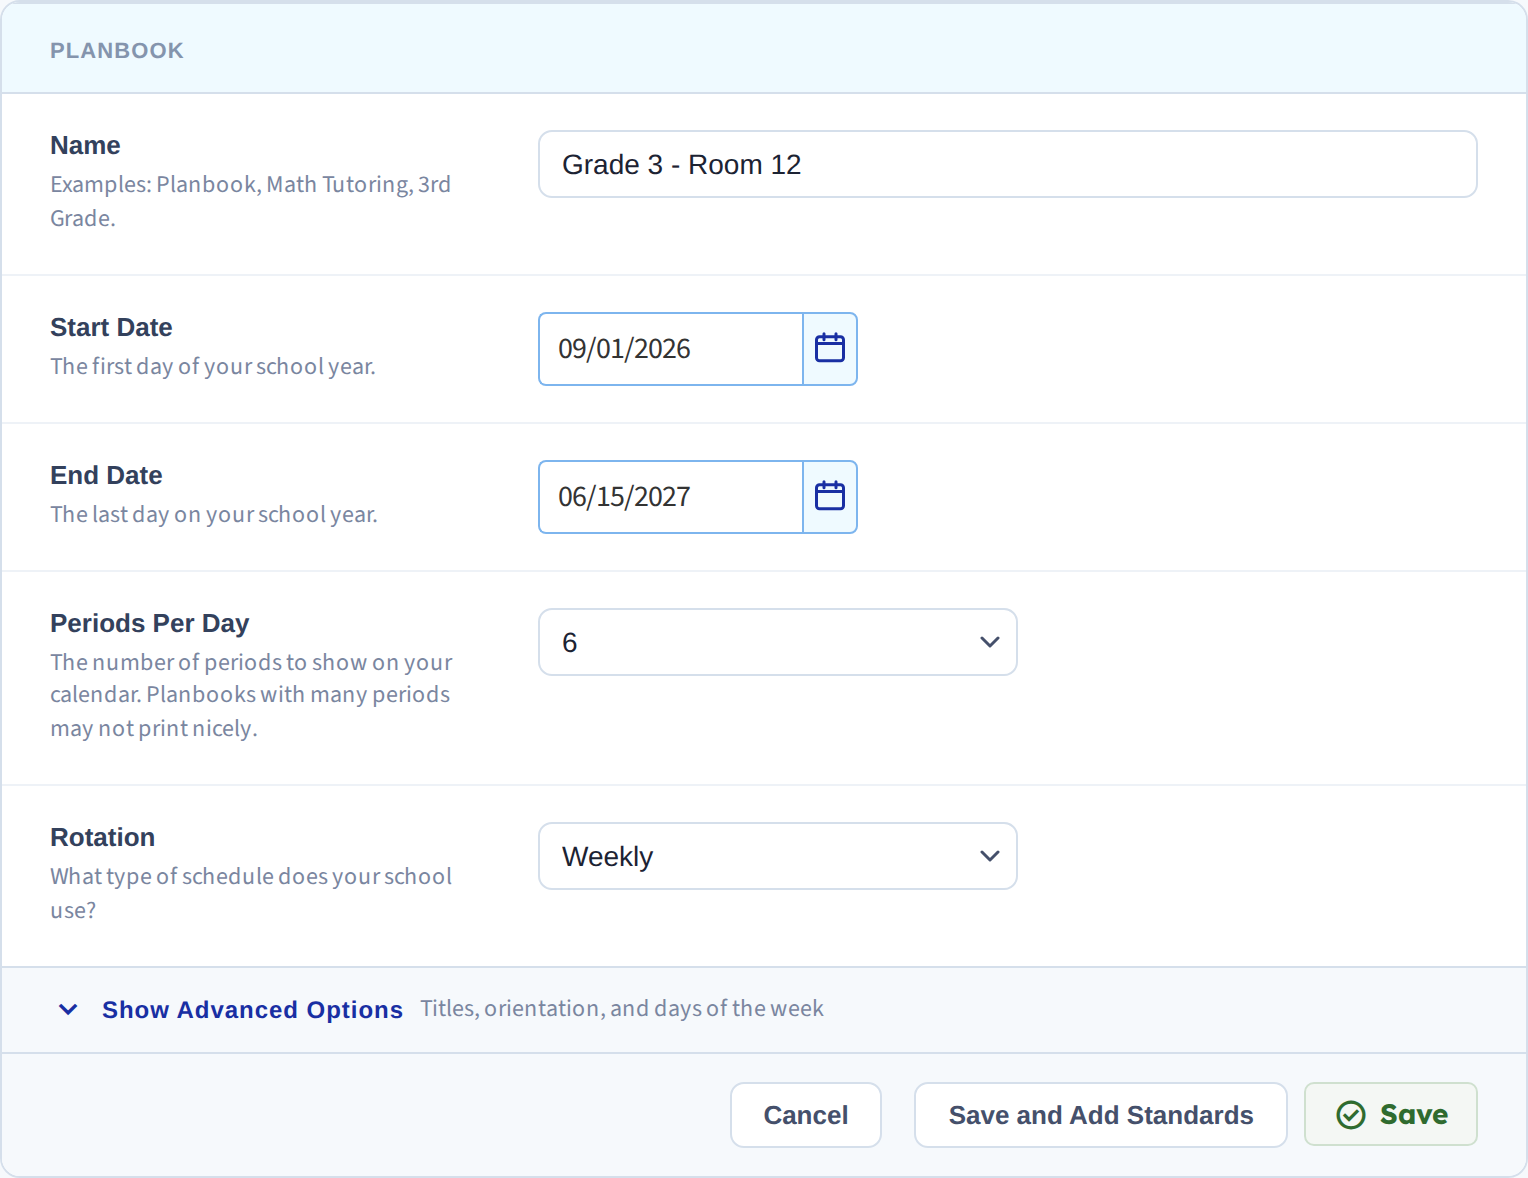
Name
Whatever helps you tell your planbooks apart. If you have only one, the default is fine. If you teach several sections, give them names you'll recognize in a list: "Period 3 Biology", "Grade 3 — Room 12".
The name is also what appears at the top of the weekly view, depending on your Title setting under advanced options.
Start Date and End Date
The first and last day of your school year. These decide which weeks exist in the planbook — you can't navigate to a week outside them.
Use your district calendar rather than approximating. If the calendar shifts later, change the dates here; plans you've already written stay on the dates you wrote them.
Periods Per Day
How many rows (or columns) the grid has — anywhere from 1 to 30. Count the blocks you actually write plans for, including homeroom or specials if you plan for those.
Adding periods here appends them to the end. Reducing the number removes them from the bottom up, so if the period you want gone isn't last, reorder your periods first — otherwise you'll delete the wrong one.
Planbooks with a lot of periods don't print well. If you're above ten or so, check Print your plans before the year starts.
Rotation
Leave this on Weekly if your schedule repeats identically every week. That's the default and it's what most teachers need.
If your school runs a cycle instead, choose it here — A/B Days, A/B Weeks, or a fixed cycle from 3 up to 12 days. See Rotating and A/B day schedules for what changes once you do.
Click Save when you're done. Changes take effect immediately in the weekly view.