
Sharing gives someone a link to your plans. They don't need a PlanbookEdu account, and they always see current plans rather than a snapshot you emailed weeks ago.
Create a share
Go to your shares and create a new one.
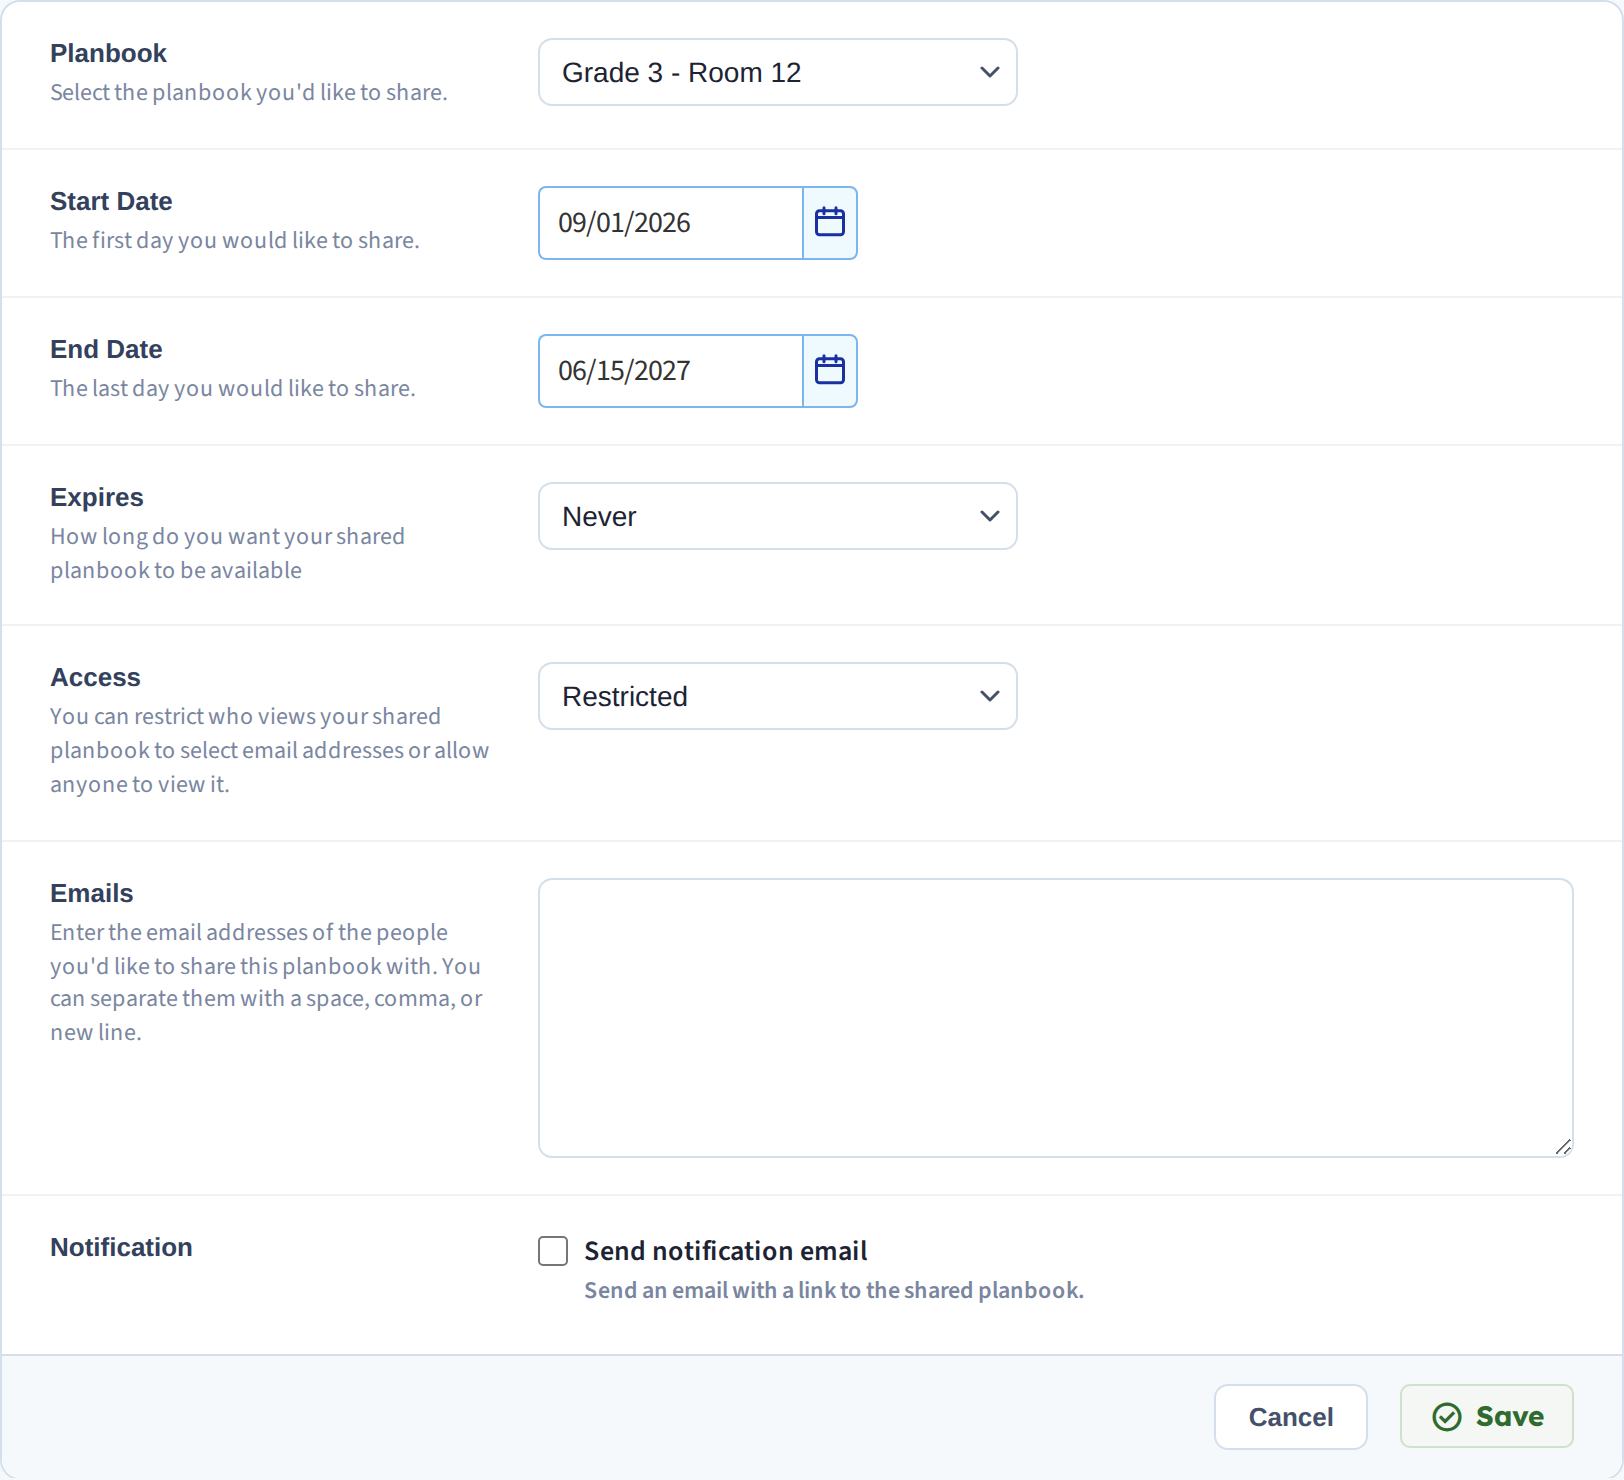
You'll set:
Planbook — which planbook to share.
Start Date and End Date — the range of plans visible. Leave it wide for ongoing access, or narrow it to one week for a substitute.
Expires — Never, 1 Day, 1 Week, 1 Month or 1 Year. See Set how long a share stays active.
Access — Restricted (only the email addresses you list) or Open (anyone with the link). See Control who can see a shared planbook.
Emails — who it's for, separated by spaces, commas or new lines.
Notification — tick Send notification email to email them the link right away. Leave it unticked to create the link quietly and send it yourself.
Choosing sensible settings
For an administrator or colleague, Restricted access with their email and a long expiry is right.
For a substitute, narrow the date range to the days they're covering and set a short expiry — a week is usually plenty.
For a parent night or a public page, Open access is the point; see Embed your planbook in a website.
Keeping some plans private
Individual plans can be held back from a share — see Hide specific plans when sharing. Your notes are never shared under any setting.
Shared plans are read-only
Anyone opening your link can read and print your plans, not change them. For someone who needs to write, see Collaborate with another teacher.
Stopping a share
Delete it and the link stops working immediately. You don't have to wait for it to expire.
Related: Share a week, day, or single period · The share email didn't arrive