
There are two different font-size controls, and which one you want depends on whether you're fixing readability everywhere or emphasising something in one lesson.
Within one lesson
This is the one most people want.
- Click Edit on the box.
- Either pick a size from the toolbar before typing, or select existing text and change it.
- Save.

Sizes run from 8 up to 150. This is real formatting saved with the entry, so it travels with the plan when it repeats, prints or is shared.
Everything at once
If the whole planbook is too small to read comfortably, there's a separate control — but only on the classic editor. Open the wrench icon in the weekly view and look for Font Size, with increase, decrease and reset.
On the modern editor, which is the default, that control isn't there: the toolbar above is where font size lives. If you don't see Font Size under the wrench, that's why, and nothing is broken.
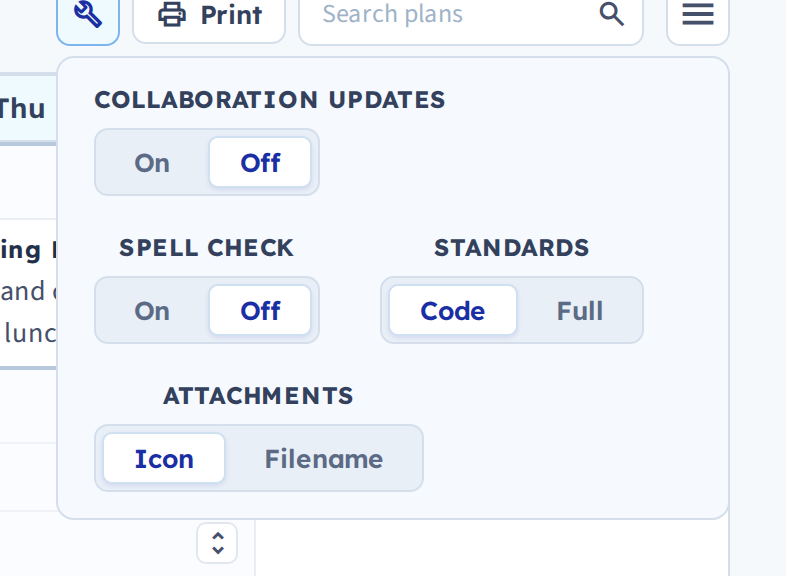
That panel is still worth knowing: it holds spell check, and whether standards and attachments show as codes/icons or in full.
Which one to reach for
If you're styling one plan, use the editor toolbar — that's the answer for nearly everyone.
One habit worth avoiding: shrinking text lesson by lesson to squeeze more in. It makes plans inconsistent and harder to read later. Pick one size and stick to it, or reduce what's in the box.
If plans are too cramped, font size may not be the real problem — see Adjust the box size, which is mostly about orientation.