
The editor is where you write a lesson. Open it by clicking edit at the top of any box in your planbook.
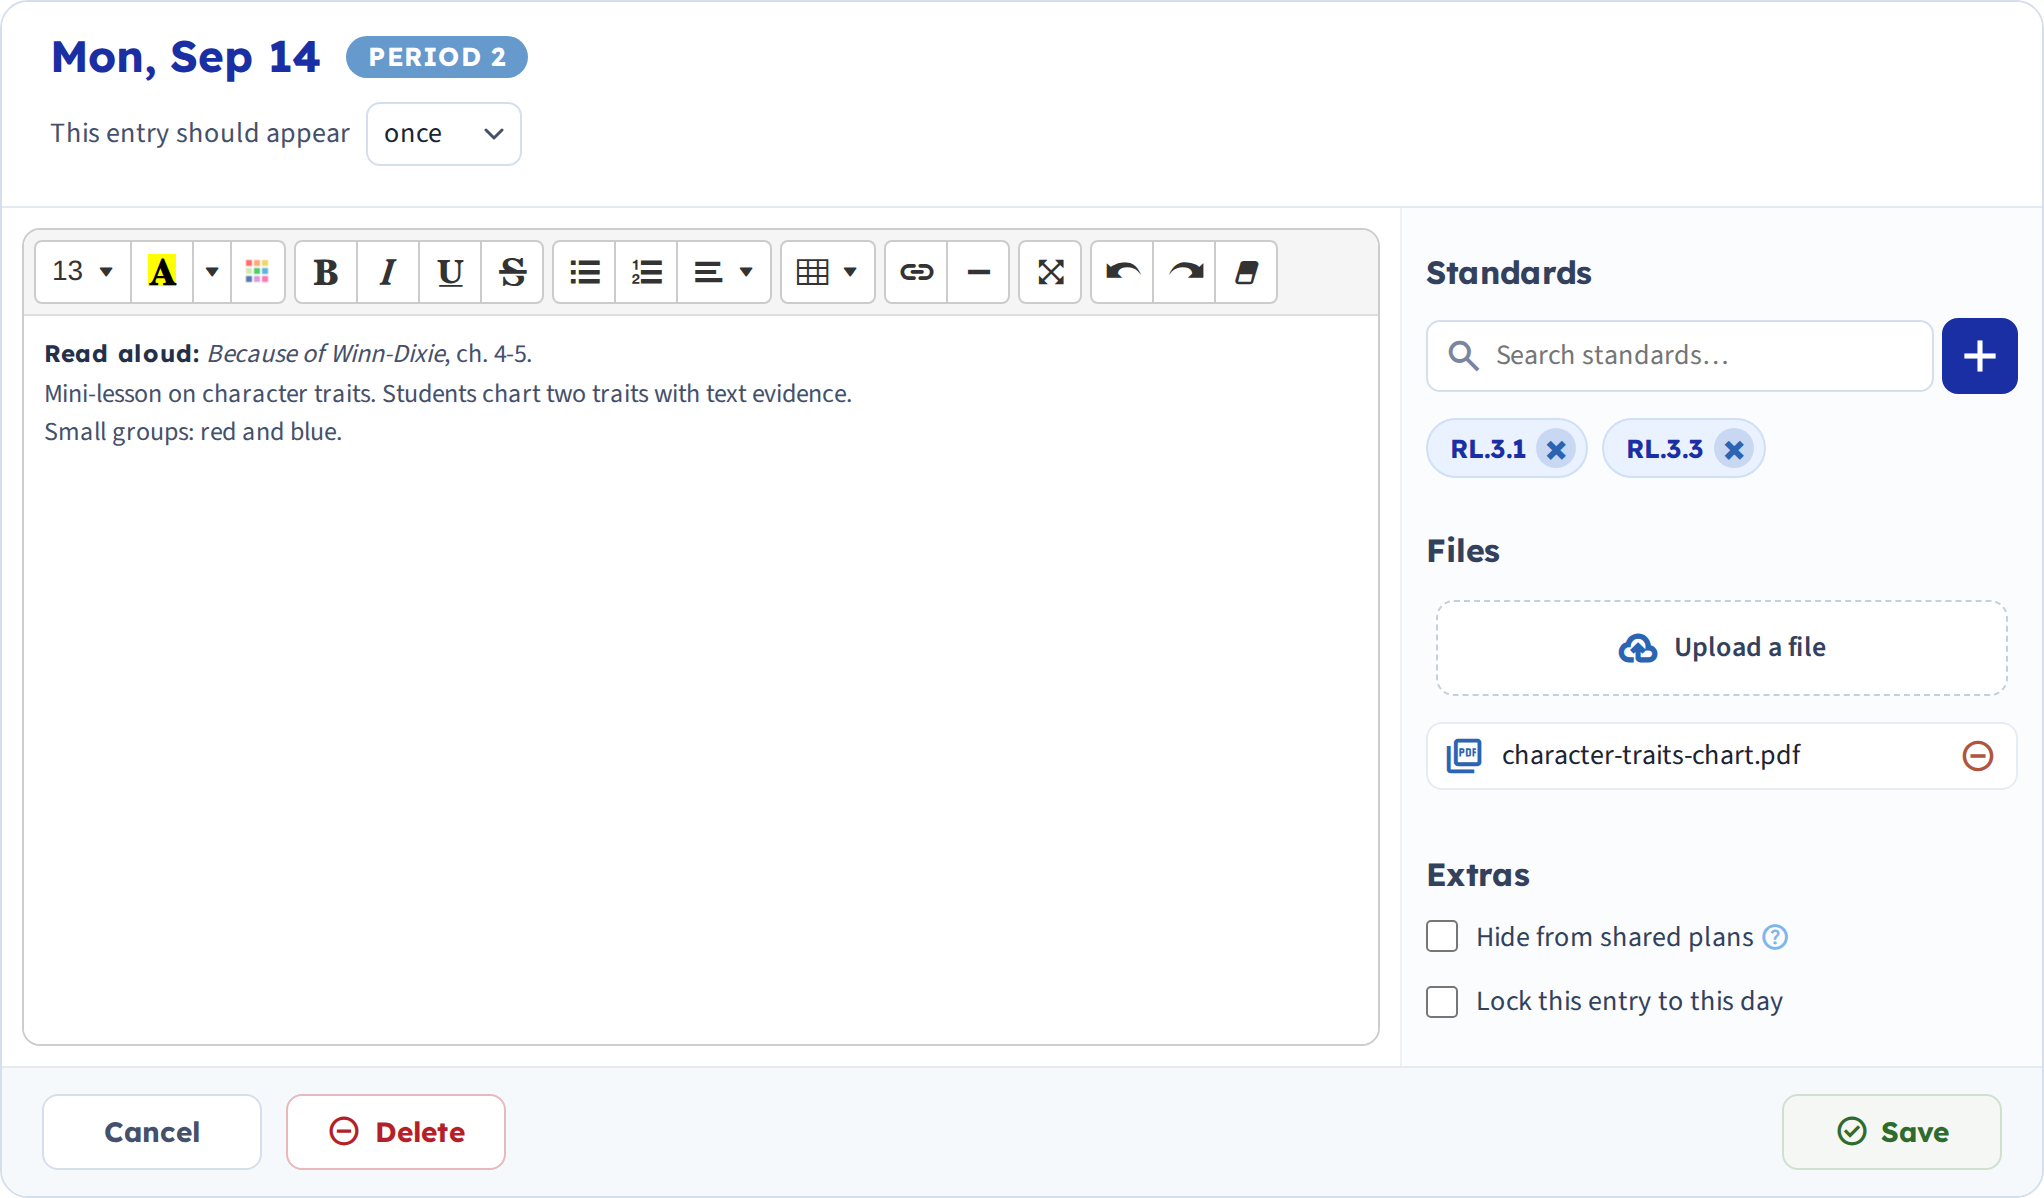
What's in it
The text area — type your plan here. Formatting tools sit along the top: bold, italic, lists, alignment, color and font size. See Formatting text in a plan.
This entry should appear — how often the plan recurs. The default is once; you can also choose daily, or repeat it on your schedule's cycle. A second dropdown then sets how far it runs. See Repeat a plan across the year.
Down the right-hand side:
Standards — if standards are enabled for the planbook, search and attach them here; attached ones show as chips you can remove with the x. See Attach standards to a plan.
Files — worksheets and handouts that belong with the lesson. See Attach files to a lesson plan.
Extras — two checkboxes: Hide from shared plans, and Lock this entry to this day so bumping moves other plans around it.
Saving
Click Save. You're returned to the view you came from with the plan in place.
Nothing is stored until you save, so if you navigate away mid-edit the plan stays as it was — Cancel does the same deliberately.
Delete empties the entry. If you delete one you needed, it's recoverable for three days — see Recover deleted plans.
The faster alternative
For a quick change — fixing a typo, adding a line — you don't need the full window. Double-click a box to edit in place. It's quicker but leaves out repeat, standards and attachments; see Quick edit vs. full edit for exactly what's missing.
Made a change you regret? An Undo link appears at the top of the page after most actions — see Undo a change.